Having a dog as a companion means you have talked to it a lot. They nod, follow your instructions, and let you know that they understand your language and what you are saying. But have you ever wished that your dog could talk back to you?

Has it ever occurred to you what your dog would say if he could talk? For example, your dog may want to let you know that it would like to go outside for a walk around the block or to the park or that it would like to take a nap or prefer to eat instead of play. But the question is how to make your dog talk?
Read More:
- What Is Clicker Training for Dogs?
- Dog Talk: How Important Is To Understand Your Dog’s “Language”
- How Do Dogs Communicate With Humans
- 5 Steps to Get a Healthy and Happy Dog
- A Dog Owner’s Guide to Renting an Apartment
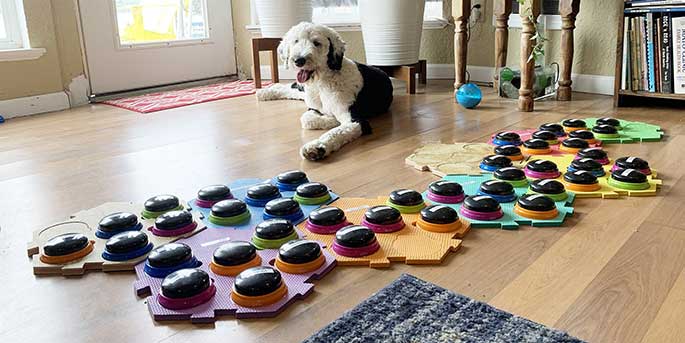
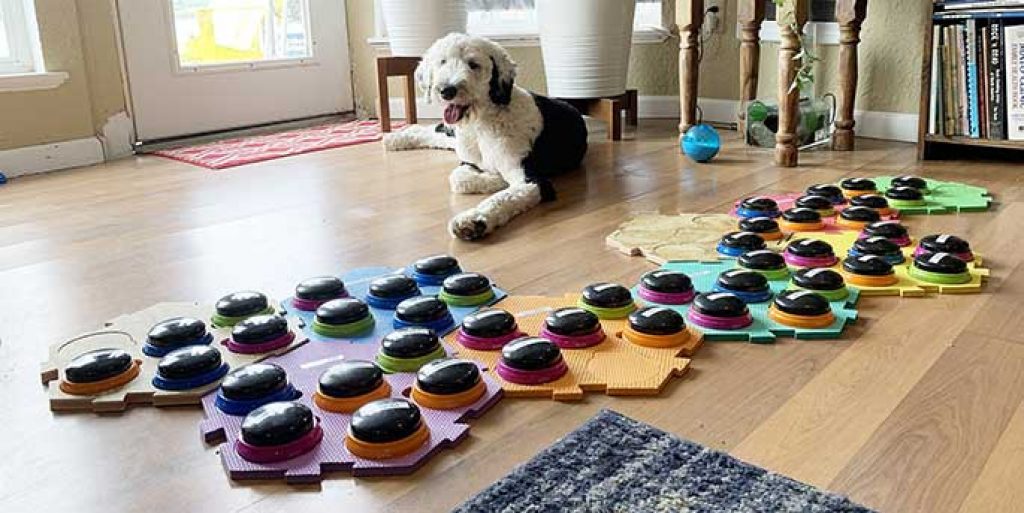
You don’t need professional dog training or speech pathology training to understand what your dog is trying to communicate. Recordable dog talking buttons is a new technique that can be used to increase communication with your dog. With a little bit of practice, your dog can communicate a few basic things like wanting to play or go on a walk.
This can be made possible through Christina Hunger, CC-SLP’s adaptive device, a San Diego-based speech-language pathologist. She has taught her dog Stella to communicate with words and feelings and adaptive speech technologies. The technology uses a pre-programable speech button with words that her dog can alternatively select when she wants to communicate her thoughts, wants, and needs.
The Supplies You Need
You will need recordable buttons that you can buy from many online retailers. If you are looking for high-end buttons, you can get them through therapeutic and medical supply companies. There are cheaper ones also available, such as a four-pack button set from Amazon, each of the buttons can be recorded for up to 30 seconds.
The buttons will have a non-skid pad attached to the bottom to prevent them from moving around as your dog pushes the button to communicate with you.
The Steps
Teaching your dog to communicate using voice recorders as a means is no doubt challenging, but this is initially only. Most dogs adapt to it quickly with constant practice. You need to be patient and allow the consistency of training for your dog to learn. Rushing is not advised as that might end up with your dog using the buttons, not understanding the meaning behind any of it. This discourages the dog from communicating independently afterward as well. The steps are listed down below:
Step 1
After the dog talking buttons are in place, you need to start the process of teaching how it works for your dog. The best thing to do will be to associate the buttons with things that are highly valued in your dog’s life, such as going for walks, playing, or going into the yard. Initially, it would help if you started with words that your dog already associates with and enjoys.
Like you can pick ‘potty,’ which can mean going out into the backyard. You can record the word potty in a button and place it in a house you need to pass to go to the backyard.
Step 2
You can start using your button once you have it ready. What needs to be done is that you need to push the button every time your dog is about to do whatever is associated with the button. For instance, if you need to go out, press the button saying ‘potty’ and then go out with your dog. You need to remember that you are not to force your dog to push the button, and you shouldn’t also directly teach the dog to push that button as a trick.
Your dog needs to learn about pushing a specific button before doing a specific activity by watching and mirroring you. So that next time they can push the button themselves in your cue when they want to perform the task associated with it. So you just need to play this out with a lot of patience and consistency.
Step 3
After giving it some time and watching you push the button, your dog will be able to connect the desired activity with the button. Once the dog is able to make the connection, it will push the button itself by mirroring you. Be sure to praise your dog when it pushes a button and instantly gives it what it is asking for. For instance, if the dog presses the button for potty, give it a treat and instantly take it outside to the backyard.
Step 4
Once you see that your dog is beginning to grasp the concept of one button and can be used correctly, you can add and assign more buttons relating to different aspects of your dog’s day. Next, you need to start rewarding your dog when it pushes a button by introducing games and toys to your dog’s day.
Build A Soundboard For The Buttons
You can build a soundboard to house all the buttons needed to communicate with your dog. You can do this easily by using Velcro to fasten the buttons to a wooden plank. Fastening it with Velcro will ensure that the buttons don’t move out of place when your dog is trying to push it. Also, remember to place the board under some furniture, or your dog might take the board everywhere it goes.
Finally
You can use this method to start interacting with your dog for more fruitful communication. You can list down all the words your dog already knows, such as trained tricks, cues, behaviors towards people, objects, names of certain toys, places like the beach and the park, etc. all these words that your dog already knows can be associated with recorded buttons, and you can teach your dog to push the related button when it needs to perform the task associated.
This way, your dog can have a conversation with you. The recordable button method is a more technologically advanced version of how to train your dog to talk to you. This version is more precise, and given a little patience and effort; you can have a much more engaging relationship with your dog. So go ahead and ger yourself this new technique to have your dog talks with buttons with you and enjoy the special bond with your dog even more.
Popular Post:


